

TL;DR:
- Mastering natural light is essential for capturing Italy’s diverse landscapes and architecture authentically.
- Optimal shooting times are during golden and blue hours, varying by location and season.
- Proper preparation, gear, and patience unlock Italy’s luminous scenes and foster artistic growth.
Italy’s iconic landscapes have a way of humbling even the most prepared photographer. You arrive at the Colosseum or the canals of Venice, camera in hand, heart full of anticipation, and somehow the images you take look flat, washed out, or simply wrong. The culprit, more often than not, is natural light. Understanding how it moves, shifts, and transforms across Italy’s diverse regions is the single most powerful skill you can develop as a traveling photographer. This guide walks you through the fundamentals of Italian light, the best locations to chase it, the gear that helps you harness it, and a step-by-step process to ensure every shot glows with authenticity.
Table of Contents
- Understanding natural light and its impact on Italian photography
- Selecting the best locations for natural light in Italy
- Essential gear and tools for capturing Italian natural light
- Step-by-step process: capturing natural light like a pro
- Why capturing natural light in Italy unlocks artistic growth
- Level up your Italian photography with immersive tours
- Frequently asked questions
Key Takeaways
| Point | Details |
|---|---|
| Master Italy’s natural light | Knowing how natural light shifts by region and season is critical for vibrant photos. |
| Gear matters | The right camera, lens, and accessories maximize your results in Italy’s changing environments. |
| Choose ideal locations | Plan your photo itinerary around Italian destinations famed for their light conditions, such as Venice or Lake Como. |
| Follow step-by-step routines | Consistent workflow from scouting to reviewing ensures you never miss the perfect natural light. |
| Unlock artistic growth | Capturing natural light isn’t just technical—it advances your skill and creativity in Italian settings. |
Understanding natural light and its impact on Italian photography
Natural light is simply the illumination produced by the sun, and it is anything but constant. It shifts in color, angle, intensity, and quality from the first blush of dawn to the deep indigo of dusk. For photographers exploring Italy, this variability is both a gift and a challenge. Natural light changes throughout the day and is especially dramatic across Italy’s landscapes, where geography, altitude, and humidity all shape the quality of the light you encounter.
The north and south of Italy offer strikingly different lighting environments. In the alpine north, around Lake Como or the Dolomites, the air is crisp and clear, producing sharp, high-contrast light that carves detail into stone and water alike. In the sun-drenched south, around Sicily or the Amalfi Coast, the atmosphere is thicker with warmth and moisture, softening shadows and wrapping everything in a golden haze. Urban environments like Milan and Rome add another layer of complexity, with tall buildings creating dramatic corridors of shadow and sudden bursts of reflected light.
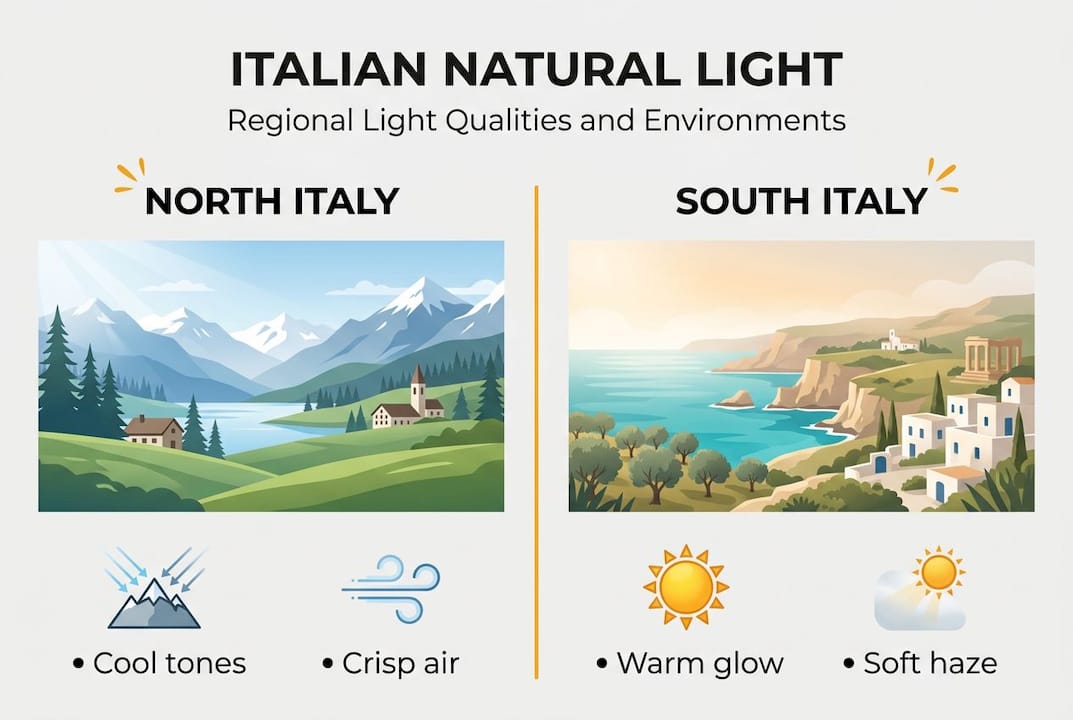
The role of light in photography is often misunderstood by beginners, who tend to assume that more sunlight means better photos. In reality, the harsh midday sun is the most difficult light to work with. It flattens textures, bleaches colors, and creates unflattering shadows. The golden hour, that magical window just after sunrise and just before sunset, bathes Italian landscapes in warm amber tones and long, sweeping shadows that add depth and dimension to any frame.
The blue hour, the brief period of twilight before sunrise and after sunset, offers a cooler, more ethereal quality of light that transforms Venice’s canals and Florence’s piazzas into something almost otherworldly.
| Time of day | Light quality | Best for |
|---|---|---|
| Golden hour (sunrise) | Warm, soft, low angle | Landscapes, canals, architecture |
| Morning (mid) | Neutral, building contrast | Street scenes, markets |
| Midday | Harsh, direct, flat | Avoid or use shade |
| Golden hour (sunset) | Rich amber, long shadows | Portraits, cityscapes |
| Blue hour | Cool, diffused, luminous | Water reflections, urban glow |
Factors that shape light quality across Italy include altitude, coastal humidity, urban canyon effects, seasonal cloud cover, and the reflective surfaces of stone and water.
Pro Tip: Download a weather and sun-tracking app like PhotoPills or Sun Surveyor before your trip. Pair it with advice from a local guide who knows how light moves through specific streets and squares at different times of year.
Selecting the best locations for natural light in Italy
With a solid grasp of how natural light in Italy behaves, the next step is choosing locations that reward your timing. Not all Italian cities and landscapes are created equal when it comes to photographic light, and knowing what each destination offers helps you plan a smarter itinerary.
Venice is perhaps the most celebrated location for natural light photography in all of Italy. The city sits low on the water, and its canals act as mirrors, doubling the beauty of the sky above. Venice offers a 90-minute golden hour ideal for color-rich shots, a longer window than many other Italian cities enjoy due to its flat horizon and reflective lagoon. The soft morning mist that often clings to the canals adds an almost painterly softness to early shots.
Florence rewards photographers who arrive before the crowds. The warm ochre and terracotta tones of its buildings absorb golden hour light beautifully, glowing like embers at dusk. Rome’s ancient stone structures, particularly the Colosseum and the Roman Forum, take on a dramatic, almost cinematic quality in late afternoon light, when long shadows trace the contours of centuries-old architecture.
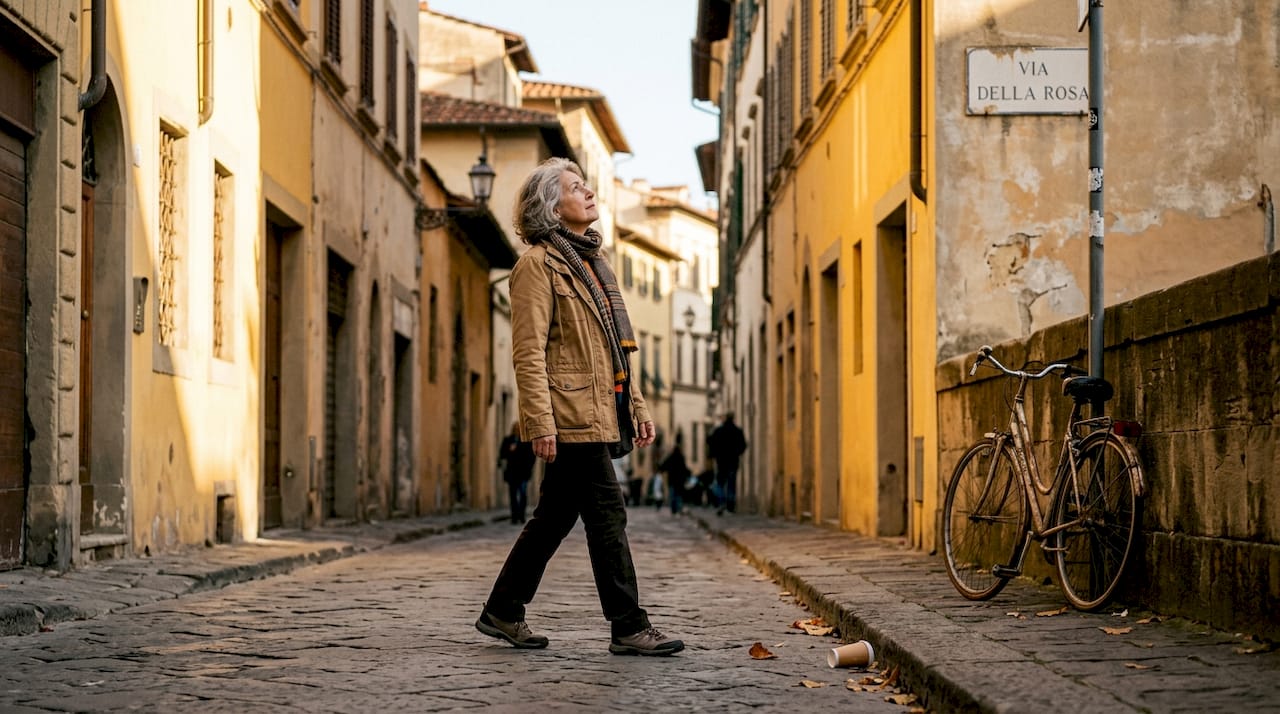
Milan surprises many photographers with its interplay of modern glass and historic stone. The Galleria Vittorio Emanuele II, with its soaring glass dome, creates extraordinary interior light at midday, one of the few cases where noon light actually works in your favor. Lake Como, with its mountain backdrop and reflective waters, offers some of Italy’s most serene and luminous landscape opportunities, especially in the soft light of early morning.
| Location | Best light time | Signature light quality |
|---|---|---|
| Venice | Sunrise, blue hour | Reflective, misty, golden |
| Florence | Sunset | Warm, ochre-toned, glowing |
| Rome | Late afternoon | Dramatic, high-contrast |
| Milan | Midday (Galleria) | Diffused, architectural |
| Lake Como | Early morning | Serene, luminous, crisp |
Factors influencing light quality at any given location include altitude above sea level, proximity to water, surrounding terrain, urban density, and the color and texture of local building materials. A solid workflow for Italian landscapes always begins with researching these variables before you ever lift your camera.
Essential gear and tools for capturing Italian natural light
Knowing where and when to shoot is only meaningful if you arrive prepared. Adapting gear and settings is key to capturing authentic light scenes, and Italy’s varied environments demand a thoughtful kit.
Your camera body matters less than you might think, but your lens choices matter enormously. A fast prime lens with an aperture of f/1.8 or f/2.8 gives you the flexibility to shoot in the low light of blue hour without pushing your ISO into noisy territory. A wide-angle lens captures the sweeping grandeur of Tuscan hillsides, while a short telephoto compresses the layers of Venice’s narrow calli into something intimate and layered.
| Gear item | Purpose | Recommended spec |
|---|---|---|
| Camera body | Core capture device | Mirrorless or DSLR, 20MP+ |
| Prime lens | Low-light flexibility | f/1.8, 35mm or 50mm |
| Tripod | Stability for blue hour | Lightweight carbon fiber |
| ND filter | Control exposure in bright sun | 3-stop or 6-stop |
| Polarizing filter | Reduce glare on water | Circular polarizer |
| Sun-tracking app | Plan golden hour timing | PhotoPills or Sun Surveyor |
Setting up your gear correctly before each shoot is a ritual worth developing. First, check your white balance and set it to match the light conditions rather than leaving it on auto. Second, test your exposure on a neutral surface and review the histogram to ensure you are not clipping highlights or crushing shadows. Third, evaluate your depth of field and adjust your aperture to suit the scene, whether you want a sharp landscape or a softly blurred background.
Pro Tip: Pack a lightweight diffuser and a small collapsible reflector in your bag. When midday sun is unavoidable, a diffuser placed between the subject and the light source softens harsh shadows instantly, while a reflector bounces warm fill light back into shaded faces or foregrounds.
One of the most common mistakes photographers make in Italy is relying entirely on automatic camera mode. Auto settings cannot interpret the emotional intent of a scene. They cannot know that you want to preserve the amber warmth of a Florentine sunset or hold the cool blue of a Venetian dawn. Understanding light and shadow mastery means taking manual control and trusting your own eye.
Step-by-step process: capturing natural light like a pro
Gear and location knowledge come together in the moment of the shoot, and having a reliable process makes all the difference. Mastering process and timing are critical for consistent natural light photos, especially in Italy where the light can shift dramatically within minutes.
Begin by scouting your location the day before or at least an hour before your planned shoot. Walk the space, observe how light falls across different surfaces, and identify your primary composition. Note where shadows will lengthen as the sun moves and where reflections appear on water or glass.
When you arrive to shoot, set up your tripod and frame your composition before the ideal light arrives. Rushing to set up during golden hour means missing the best minutes. Take several trial shots as the light builds, reviewing each one carefully on your screen.
Check your histogram after every significant shot. A good histogram for a natural light scene shows a gentle bell curve, with no spikes pressed hard against either edge. If highlights are clipping, reduce your exposure by a third of a stop. If shadows are blocked, open up slightly or use your reflector.
“The photographers who consistently capture Italy’s most luminous images are not the ones with the best cameras. They are the ones who arrive first, wait patiently, and know exactly when to press the shutter.”
Adjust and reshoot with intention. Italy’s light rewards patience. A composition that looked merely pleasant ten minutes ago can become extraordinary as the sun drops another degree toward the horizon.
Pro Tip: Always bracket your exposures during golden hour, shooting the same composition at your metered exposure, one stop under, and one stop over. This gives you maximum flexibility when editing and ensures you capture the full tonal range of the scene. The Italy Photo Tour blog offers deeper guidance on editing these bracketed sequences into finished images.
Why capturing natural light in Italy unlocks artistic growth
Here is a perspective that most photography guides will not share with you: technical mastery of natural light is not the destination. It is the doorway. The real transformation happens when you stop thinking about settings and start seeing like a painter.
Every Italian region teaches a different visual language. Venice teaches you to read reflections and embrace impermanence, because the light on its canals lasts only seconds before the water shifts. Tuscany teaches patience and simplicity, where a single cypress tree in golden light says everything. Rome teaches you to find drama in the ordinary, in the way ancient stone absorbs and releases warmth throughout the day.
Chasing natural light fosters rapid skill development and creative exploration in ways that studio practice simply cannot replicate. When you are forced to respond to shifting, uncontrollable light, your instincts sharpen. You begin to anticipate rather than react. You develop a personal vision, a way of interpreting light that is entirely your own.
The role of light in artistic growth is inseparable from the experience of place. Italy’s light does not just illuminate its landscapes. It reveals their soul. And in learning to capture that soul, you discover something about your own creative voice that no technical manual can teach.
Level up your Italian photography with immersive tours
Ready to go beyond solo practice and truly absorb Italy’s legendary light? Joining a curated photography experience places you in the right location at the right moment, guided by someone who has spent years reading the rhythms of Italian light.
With Italy photography tours led by professional photographer Mino Di Vita, you gain access to prime locations, expert feedback in real time, and a structured approach that accelerates your growth far beyond what solo exploration can offer. Whether you prefer a small group experience or a custom private tour, each itinerary is designed to place you inside Italy’s most luminous moments. If you are ready to enhance your photography skills and return home with images that genuinely move people, this is your next step.
Frequently asked questions
What time of day is best for capturing natural light in Italy?
Golden hour, just after sunrise and just before sunset, offers the richest colors and softest shadows for Italian photos. Venice’s 90-minute golden hour is particularly celebrated for its color-rich, reflective quality.
How do I handle harsh midday sunlight when exploring Italy?
Use diffusers, reflectors, and shaded architectural spots to soften or redirect direct sunlight, avoiding flat and overexposed images. A lightweight diffuser is one of the most practical tools you can carry.
Are there specific Italian regions better for photographing natural light?
Venice, Lake Como, Florence, Milan, and Rome are highly recommended for their unique lighting conditions and photogenic landscapes. Each city offers a distinct lighting character shaped by its geography, architecture, and proximity to water.
What camera settings should I use for natural light shots in Italy?
Manual or aperture priority modes, ISO 100 to 400, and bracketing exposures are effective for capturing authentic scenes across Italy’s varied environments.
How can I quickly review if my photo captures natural light authentically?
Check your camera’s histogram, zoom into shadows and highlights, and adjust exposure if colors look washed out or clipped. A clean histogram is your most reliable guide for consistent natural light results.